 盘古BPM交流群号:963222735
本文重点介绍如何快速搭建spring boot工程。
构建spring boot工程一般采用两种方式 gradle 、maven等,我们这里使用maven的方式。
1.创建一个maven工程,对应的pom.xml文件
<parent>
    <groupId>org.springframework.boot</groupId>
    <artifactId>spring-boot-starter-parent</artifactId>
    <version>1.5.2.RELEASE</version>
    <relativePath/> <!-- lookup parent from repository -->
</parent>
<properties>
    <project.build.sourceEncoding>UTF-8</project.build.sourceEncoding>
   <project.reporting.outputEncoding>UTF-8</project.reporting.outputEncoding>
    <java.version>1.8</java.version>
</properties>
<dependencies>
    <dependency>
      <groupId>org.springframework.boot</groupId>
      <artifactId>spring-boot-starter</artifactId>
    </dependency>
    <dependency>
      <groupId>org.springframework.boot</groupId>
      <artifactId>spring-boot-starter-test</artifactId>
      <scope>test</scope>
     </dependency>
</dependencies>
  <build>
    <plugins>
      <plugin>
        <groupId>org.springframework.boot</groupId>
        <artifactId>spring-boot-maven-plugin</artifactId>
     </plugin>
    </plugins>
</build>
本文的版本为1.5.2.RELEASE。
2.创建Application.java
@RestController
@SpringBootApplication
public class Application {
@RequestMapping("/")
String index() {
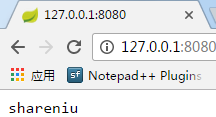
return "shareniu";
}
public static void main(String[] args) {
SpringApplication.run(Application.class, args);
}
}
上述代码中,已经内嵌了tomcat,端口默认为8080
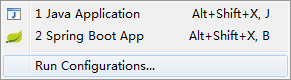
运行Application.java如下所示:
3.控制台输出信息如下
'##:::::'##:'####::'######::'########:'##:::::::'##:::'##:
##:'##: ##:. ##::'##... ##: ##.....:: ##:::::::. ##:'##::
##: ##: ##:: ##:: ##:::..:: ##::::::: ##::::::::. ####:::
##: ##: ##:: ##::. ######:: ######::: ##:::::::::. ##::::
##: ##: ##:: ##:::..... ##: ##...:::: ##:::::::::: ##::::
##: ##: ##:: ##::'##::: ##: ##::::::: ##:::::::::: ##::::
. ###. ###::'####:. ######:: ########: ########:::: ##::::
:...::...:::....:::......:::........::........:::::..:::::
2017-04-14 11:33:40.030  INFO 11180 --- [           main] com.wisely.ch5_2_2.Application           : Starting Application on G6OGKO6H6SIEGWW with PID 11180 (started by Administrator in D:\迅雷下载\28208 SpringBootSourceCode - 副本\SourceCode\ch5_2_2)
2017-04-14 11:33:40.082  INFO 11180 --- [           main] ationConfigEmbeddedWebApplicationContext : Refreshing org.springframework.boot.context.embedded.AnnotationConfigEmbeddedWebApplicationContext@146044d7: startup date [Fri Apr 14 11:33:40 CST 2017]; root of context hierarchy
2017-04-14 11:33:40.778  INFO 11180 --- [           main] o.s.b.f.s.DefaultListableBeanFactory     : Overriding bean definition for bean 'beanNameViewResolver' with a different definition: replacing [Root bean: class [null]; scope=; abstract=false; lazyInit=false; autowireMode=3; dependencyCheck=0; autowireCandidate=true; primary=false; factoryBeanName=org.springframework.boot.autoconfigure.web.ErrorMvcAutoConfiguration$WhitelabelErrorViewConfiguration; factoryMethodName=beanNameViewResolver; initMethodName=null; destroyMethodName=(inferred); defined in class path resource [org/springframework/boot/autoconfigure/web/ErrorMvcAutoConfiguration$WhitelabelErrorViewConfiguration.class]] with [Root bean: class [null]; scope=; abstract=false; lazyInit=false; autowireMode=3; dependencyCheck=0; autowireCandidate=true; primary=false;
factoryBeanName=org.springframework.boot.autoconfigure.web.WebMvcAutoConfiguration$WebMvcAutoConfigurationAdapter; factoryMethodName=beanNameViewResolver; initMethodName=null; destroyMethodName=(inferred); defined in class path resource [org/springframework/boot/autoconfigure/web/WebMvcAutoConfiguration$WebMvcAutoConfigurationAdapter.class]]
2017-04-14 11:33:41.722  INFO 11180 --- [           main] s.b.c.e.t.TomcatEmbeddedServletContainer : Tomcat initialized with port(s): 8080 (http)
2017-04-14 11:33:42.037  INFO 11180 --- [           main] o.apache.catalina.core.StandardService   : Starting service Tomcat
2017-04-14 11:33:42.039  INFO 11180 --- [           main] org.apache.catalina.core.StandardEngine  : Starting Servlet Engine: Apache Tomcat/8.0.23
2017-04-14 11:33:42.179  INFO 11180 --- [ost-startStop-1] o.a.c.c.C.[Tomcat].[localhost].[/]       : Initializing Spring embedded WebApplicationContext
2017-04-14 11:33:42.179  INFO 11180 --- [ost-startStop-1] o.s.web.context.ContextLoader            : Root WebApplicationContext: initialization completed in 2101 ms
2017-04-14 11:33:42.971  INFO 11180 --- [ost-startStop-1] o.s.b.c.e.ServletRegistrationBean        : Mapping servlet: 'dispatcherServlet' to [/]
2017-04-14 11:33:42.976  INFO 11180 --- [ost-startStop-1] o.s.b.c.embedded.FilterRegistrationBean  : Mapping filter: 'characterEncodingFilter' to: [/*]
2017-04-14 11:33:42.977  INFO 11180 --- [ost-startStop-1] o.s.b.c.embedded.FilterRegistrationBean  : Mapping filter: 'hiddenHttpMethodFilter' to: [/*]
2017-04-14 11:33:43.302  INFO 11180 --- [           main] s.w.s.m.m.a.RequestMappingHandlerAdapter : Looking for @ControllerAdvice: org.springframework.boot.context.embedded.AnnotationConfigEmbeddedWebApplicationContext@146044d7: startup date [Fri Apr 14 11:33:40 CST 2017]; root of context hierarchy
2017-04-14 11:33:43.393  INFO 11180 --- [           main] s.w.s.m.m.a.RequestMappingHandlerMapping : Mapped "{[/]}" onto java.lang.String com.wisely.ch5_2_2.Application.index()
2017-04-14 11:33:43.396  INFO 11180 --- [           main] s.w.s.m.m.a.RequestMappingHandlerMapping : Mapped "{[/error]}" onto public org.springframework.http.ResponseEntity<java.util.Map<java.lang.String, java.lang.Object>> org.springframework.boot.autoconfigure.web.BasicErrorController.error(javax.servlet.http.HttpServletRequest)
2017-04-14 11:33:43.396  INFO 11180 --- [           main] s.w.s.m.m.a.RequestMappingHandlerMapping : Mapped "{[/error],produces=[text/html]}" onto public org.springframework.web.servlet.ModelAndView org.springframework.boot.autoconfigure.web.BasicErrorController.errorHtml(javax.servlet.http.HttpServletRequest)
2017-04-14 11:33:43.423  INFO 11180 --- [           main] o.s.w.s.handler.SimpleUrlHandlerMapping  : Mapped URL path [/webjars/**] onto handler of type [class org.springframework.web.servlet.resource.ResourceHttpRequestHandler]
2017-04-14 11:33:43.423  INFO 11180 --- [           main] o.s.w.s.handler.SimpleUrlHandlerMapping  : Mapped URL path [/**] onto handler of type [class org.springframework.web.servlet.resource.ResourceHttpRequestHandler]
2017-04-14 11:33:43.463  INFO 11180 --- [           main] o.s.w.s.handler.SimpleUrlHandlerMapping  : Mapped URL path [/**/favicon.ico] onto handler of type [class org.springframework.web.servlet.resource.ResourceHttpRequestHandler]
2017-04-14 11:33:43.583  INFO 11180 --- [           main] o.s.j.e.a.AnnotationMBeanExporter        : Registering beans for JMX exposure on startup
2017-04-14 11:33:43.670  INFO 11180 --- [           main] s.b.c.e.t.TomcatEmbeddedServletContainer : Tomcat started on port(s): 8080 (http)
2017-04-14 11:33:43.675  INFO 11180 --- [           main] com.wisely.ch5_2_2.Application           : Started Application in 3.903 seconds (JVM running for 5.054)
浏览器输入地址:http://127.0.0.1:8080/。输出信息如下:
4.傻瓜式构造项目
对于spring boot项目的快速搭建可以使用该方式: 需要的依赖可以自动导入
打开http://start.spring.io/网站,如下所示:
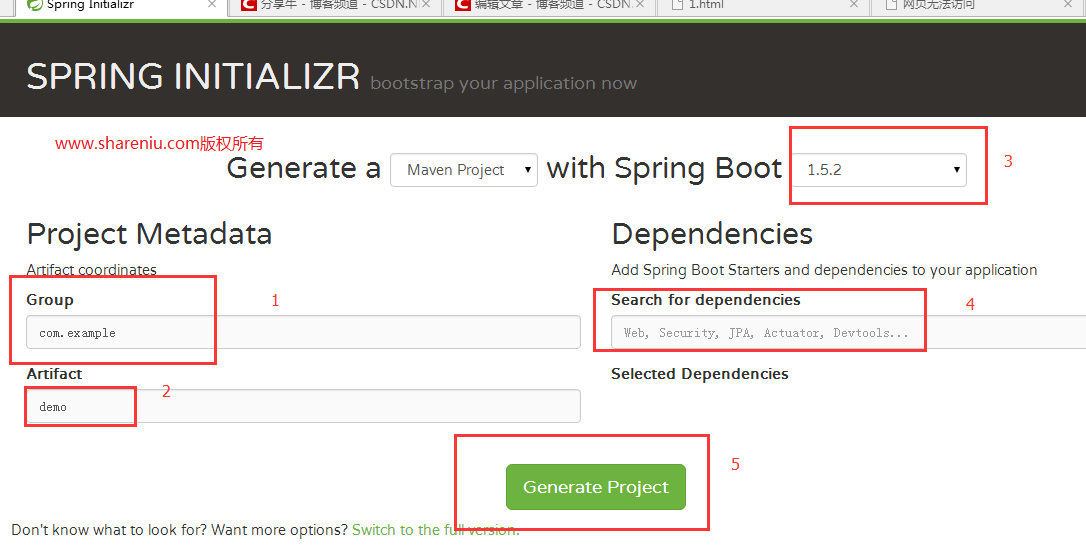
上图的区域1和2对应的maven的仓库地址以及坐标信息。区域3可以选择指定的spring boot版本。区域4可以输入依赖的,比如activiti等等。项目需要什么直接引入即可。区域5直接下载该项目到本地即可。
第一个案例就到这里。
转载请注明:分享牛 » spring boot工程搭建